Monday, August 21, 2006

Fried Corn with Thyme, Shallots & Chilies


Fried Corn with Thyme, Shallots & Chilies (Serves 4-6)

by dale reinert

Ingredients
4 Tbls unsalted butter
4 shallots, finely chopped
1 red chile, finely diced (or 1\4 tsp red chile flake)
1 32-oz package frozen petit, yellow corn (defrosted and drained)
3 Tbls fresh thyme leaves, chopped
Kosher salt
Pepper

Procedure
  1. Melt butter in a heavy frying pan or chef’s pan. When hot, add the shallots and cook until translucent and tender, about 2-3 minutes.
  2. Add the red diced chile and stir for about 2 minutes more.
  3. Add the corn and fry for 10 minutes or until heated thoroughly. Then add the thyme, salt and pepper and continue to stir another 2-3 minutes.

Corn Stuffed Baked Onions


Corn Stuffed Baked Onions (Serves 6-8)

by dale reinert

Ingredients
6 medium sweet onions
12 oz. frozen corn (and peppers, if possible)
2 Tbls. butter
1 can cream of celery soup
8 oz. cup sharp Cheddar cheese, shredded
Salt and pepper to taste

Procedure
  1. Cut the top third off of each onion and peel the outer layer. Trim the root end so the onion will sit upright and stable in a baking dish.
  2. Using a paring knife and teaspoon or a melon baler, gauge out the center of the onion, creating a cavity to be filled by the corn stuffing.
  3. In a 2 quart bowl, mix together the corn and peppers, soup, and most of the cheese. Reserve some for topping the onions. Mix together.
  4. Melt the 2 tablespoons of butter and brush the onions inside and out to encourage browning.
  5. Fill the cavities with the stuffing mixture and top with the remaining choose.
  6. Bake at 400 degree until the onion is golden brown on the outside and very tender throughout and the filling is bubbling.

Corn on the Cob Basics, Plus Butter Applications


Corn on the Cob Basics, Plus Butter Applications

by dale reinert

How to Boil It…

Remove all the husks and silk form the corn. Leave about a 1-2 inch stalk at the end as a holder, if you don’t have corn-on-the-cob holders.

  1. Place corn in a large pot, cover with cold water, add three teaspoons sugar and one teaspoon salt. Place on high heat and bring to a boil for 3-4 minutes.
  2. Turn the heat off. Remove cobs as needed. Corn can remain in water for up to 90 minutes without becoming tough or overcooked.

How to Grill It…

Cut the silky end of the ear with a very sharp knife. Then submerge the ear in a large container of water for at least one hour.

  1. Preheat the grill to medium or medium high. Place the soaked ears on the grill in a single layer, turning a quarter turn every ten minutes.
  2. Using a tongs, remove the ears from the grill to a waiting platter. Peel back the husks and silk with oven mitts or a fork. While silk is often very hard to remove from raw corn, it comes away freely from steamed cobs.
  3. Roll in butter, sprinkle with salt and pepper, and enjoy.

Compound Butters…

Sometimes, for a change of pace, it’s nice to switch out regular sweet butter for a compound butter – or a butter that has had flavors added to it, like the three the follow and is pictured here from left to right.

Basil Butter
1 stick soft unsalted butter
3 Tbls prepared basil pesto sauce
3 Tbls grated parmesan cheese
1 tsp lemon juice

Chili Compound Butter
1 stick unsalted butter
2 tsp chili powder
1 tsp ground cumin
1\2 tsp Tabasco sauce
salt and freshly cracked black pepper

Lemon-Thyme Butter
1 stick unsalted butter
10 chives, minced
2 shallots, minced
1 tsp minced fresh thyme leaves
1 teaspoon freshly squeezed lemon juice

Mexican Corn Cake


Mexican Corn Cake (Serves 12-15)

by dale reinert

Ingredients
3 eggs
1 1/2 cups yellow corn meal
2 tsp baking soda
1 cup of cream style corn
1/4 cup of oil 1 cup of buttermilk
1 medium onion chopped
1 green bell pepper 2
red jalapeno peppers, seeded and chopped
8 oz. pkg. of shredded extra sharp cheddar cheese, divided
1 tsp kosher salt

Procedure
  1. Mix the ingredients in this order adding half of the cheese in the batter.
  2. Pour the batter into an oiled cast iron skillet or a dark metal 9x13 inch greased and floured baking pan.
  3. Top with the other half of the cheese. Bake at 375 degrees for about one hour for the iron skillet and about 50-55 minutes for the baking pan. (This cake is designed to be very moist. For a drier cake, sautee all the veggies to remoe their moisture.)

Wednesday, August 16, 2006

The Grown Up Taste of Rhubarb


The Grown Up Taste of Rhubarb

by dale reinert, food editor

I just didn’t understand it. I was nine years old and tears were streaming down my cheeks as the east wall of the garage came crashing down on my first veggie patch. What I did understand was my parents’ care in making sure that not a single shingle or rusty nail land on the southern side of the garage where the rhubarb stalks stood.

Back on the eastside my tomatoes were crushed; my cucumbers smashed, but the southern wall as braced and gently nudged so it would collapse northward.

Rhubarb is beyond bitter. It’s sour, sour, sour. I am often amazed that humankind ever figured out how to make use of it, like the thistle-like cardoons. As an adult, however, I have come to understand how the sweetness of sugar (or strawberries) plays so wonderful against the backdrop of rhubarb. Here are some of my favorite Midwestern dishes made by some of my Midwestern favorite people.

Rhubarb Crunch (Aunt Glenda's)


Aunt Glenda's Rhubarb Crunch

by glenda reinert,
sherrill’s mound, iowa

Ingredients
8 cups rhubarb, chopped 1\2-1 inch cubes
2 cups white sugar
2 cups water
4 Tablespoons cornstarch
2 teaspoons vanilla
2 cups all-purpose flour
2 cups brown sugar
1 cup margarine
1 1\3 cup oatmeal
2 teaspoon cinnamon

Procedure
  1. Preheat the oven to 350 degree. Mix the flour, brown sugar, margarine, oatmeal and cinnamon together. Press two thirds of this mixture into the bottom of a 9”x13” cake pan.
  2. In a microwave or a saucepan, bring to a boil until thickened the white sugar, water, cornstarch. Stir thoroughly every couple of minutes. Once thicken, stir in vanilla. Pour over the rhubarb.
  3. Spread the remaining crumb mixture evenly across the pan and bake for 45-50 minutes. Serve with vanilla ice cream.

Cream Cheese Rhubarb Pie (Aunt Jodi's)


Cream Cheese Rhubarb Pie


by jodi reinert,
dubuque, iowa

Ingredients
4 cups rhubarb, chopped into 1\2-1 inch cubes
1 cup sugar
3 Tablespoons cornstarch
1\4 teaspoon salt
1 (9-inch) unbaked pie crust (see recipe below)
1 (8 ounce) package cream cheese (at room temperature)
2 eggs
1 cup sour cream
1\2 cup sugar
Almonds (slivered) for garnish

Procedure
  1. Preheat oven to 425 degrees. In a sauce pan over medium heat, cook rhubarb, 1 cup sugar, cornstarch, and salt. The mixture must boil, so the cornstarch will thicken, but it is not essential that all the rhubarb cook down.
  2. Pour this mixture into the waiting pie crust. Bake 10 minutes and remove form oven. Reduce the oven’s setting to 350 degrees.
  3. In a mixer’s bowl, on medium speed, beat the cream cheese, eggs, and a 1\2 cup sugar until smooth. Pour over the rhubarb mixture and spread evenly.
  4. Bake the pie for another 30-35 minutes until set. Allow to cool and serve chilled. Garnish with sour cream and toasted almonds to serve.

Rhubarb Cake (Mom's)


Mom's Rhubarb Cake


by betty reinert
hazel green, wisconsin

Ingredients
3 cups rhubarb, chopped into 1\2-1 inch cubes
1 1\2 cups brown sugar
1\2 cup butter flavored shortening
2 eggs
1\2 teaspoon salt
1 cup milk soured by 1 tablespoon vinegar
1 teaspoon baking soda
2 cups flour
2 teaspoons vanilla

Topping
1\2 cup sugar
2 tablespoon cinnamon

Procedure

  1. Preheat the oven to 375 degrees. Butter and flour a 9”x13” inch cake pan.
  2. Cream the sugar and shortening. Add the eggs and salt. Stir in the soured milk, soda, vanilla and flour. Pour the batter into the bake.
  3. Even spread the rhubarb across the top of batter and sprinkle with the cinnamon-sugar topping. Bake for 30 minutes or until a knife can be inserted and removed cleanly.

Tuesday, August 15, 2006

Dale's Veggie Burgers


Dale's Veggie Burgers

Serves about 12

Ingredient
2 large portabello mushrooms, chopped and sauteed
1 can black beans, divided
1 medium potato, boiled, cooled (about 1 cup by volume)
1 cup carrots, grated
3 cloves garlic, minced
1 cup diced onion
2 eggs plus 1 egg white
1 cup whole wheat flour
2 cup quick cooking oatmeal
1\2 cup sour cream
1\4 cup ketchup
1 Tablespoon Steak or BBQ Sauce
2 Tablespoons Canola oil
1 Tablespoon Italian seasoning
4 Tablespoons Italian parsley chopped
1 Tablespoon Cilantro, chopped
1\4 Jalapeno pepper, finely diced
1 teaspoon salt
3\4 teaspoon pepper
Healthy pinch of cayenne

Procedure:
1. In a food processor, blend together the cooked mushrooms, 1 cup of the black beans,
potatoes, eggs and egg white, and onions until thoroughly blended.

2. Place the rest of the bean and all the remaining ingredients in a large bowl. Transfer the blended the mixture from the food processor to the bowl and stir well until all the ingredients are moistened and combined.

3. Heat a large, deep-sided chef’s pan over medium high heat with 1\2 cup of canola oil. Using a large serving spoon or a 3\4 cup measure, drop the veggie burgers onto the heated pan. A spatula can be used to shape and flatten the burgers into rounds for traditional hamburger buns or narrow ovals, like hoagies. Flatten the burgers to make sure they cook through. (For mini-burgers, use a #20 food disher.) Cook on each side for 3 minutes.

4. Serve with your favorite condiments. Instead of ketchup and mustard, I use peppercorn ranch dressing and barbecue sauce for veggie burgers.

Outdoor Burgers -- Hamburgers for the Grill


Outdoor Burgers

Serves 3-4

Ingredients
1 package 85% lean ground chuck, about 16-20 ounces
1 teaspoon granulated garlic
1 teaspoon granulated onion
1 teaspoon kosher salt
1 teaspoon ground white pepper
3-4 buns, toasted and prepared

Procedure
  1. Preheat the grill on high heat. When it is thoroughly heated, scrap the grates clean and lubricated lightly with oil. Keep the lid open for a few minutes and reduce the burner heat to medium high.
  2. In a large bowl, using your hands gently but thoroughly combine the meat and all the seasonings. This must be done both quickly and thoroughly as you do not want the heat of your hands to start to chemically change or physically alter the characteristics of the meat.
  3. On pieces of wax paper or parchment, trace a circle around the bun bottom. Repeat three or four times, depending on the number of burgers. Turn each piece over.
  4. Using two dinner forks, shape the burgers into round about 3\4” high and 1\4” bigger than the drawn circles. This accounts for shrinkage. Do not use the forks to press and push down on the burgers. Use them to shape, sculpt, and nudge.
  5. Spray vegetable oil on the burgers, invert onto the hot grill, spray the top side with vegetable oil for 1 second, and leave alone for about 4 minutes. Turn the burgers over and cook for 3-4 minutes more.
  6. Add pre-buttered – I prefer mayo – buns to the grill. When the burgers reach an internal temperature of 155 degrees, remove to a platter and let rest for 10 minutes. Remove the buns to a plate. Keep an eye on the buns, they toast very quickly.

Apartment Burgers -- Hamburgers for the Stovetop


Apartment Burgers

Makes 2 Dale-sized Burgers.

Ingredients
16 ounces chuck, trimmed, cut into 1-inch cubes
1\2 teaspoon garlic powder
1\2 teaspoon onion powder
1 teaspoon kosher salt
1\2 teaspoon ground white pepper
1\4 teaspoon cinnamon

Procedure
  1. In separate batches of about 4 ounces, pulse the cubed chuck roast in a food processor 10 times. Each pulse must be a purposeful pulse, not a quick pulse. At the end of ten pulses, if the meat does not look like hamburger, then keep pulsing.
  2. Combine the meat and seasonings in a large bowl. Form the mixture into an 8-ounce patty about 3\4 of an inch thick. Heat a cast iron skillet or heavy-bottomed frying pan over medium-high heat for 2 to 3 minutes. Oil the pan with 1 tablespoon of canola oil.
  3. Place the hamburger patties in the pan. For medium-rare burgers, cook the patties for 4 minutes on each side. For medium burgers, cook the patties for 5 minutes on each side. After two minutes, loosen the burgers with a spatula, but flip the burgers only once during cooking process.
Why grind your own burger meat?
With all the concerns of e.coli bacteria, eating rare ground beef is a luxury many of us avoid. Well, e.coli exists only on the surface of meat and buying pre-ground meat means there is a lot of surface area. Grinding meat in your food processor minimizes the risk and provides a great food experience in the home.

Monday, August 14, 2006

Spaghetti Rigati with Curly Endive, Garlic and Balsamic Vinegar

Spaghetti Rigati with Curly Endive,
Garlic and Balsamic Vinegar


Ingredients:
1\2 lb Spaghetti
4 Garlic cloves, sliced
3 Tbls. Butter
3 Tbls. Olive oil
4 heads of curly endive, tops trimmed into bite-sized pieces, discard the rest
2 Tbls. Balsamic vinegar
1\2 tsp. of each Salt & pepper
Red Pepper flakes, if desired

Procedure:
  1. Boil one gallon of heavily salted water. Cook the spaghetti until it is “al dente.” (It will cook more again in Step 4.)
  2. Once a large chef’s pan has been heated, add the olive oil, then garlic and finally the butter. This is the time to add the red pepper flakes, if you want.
  3. Toss the curly endive tops in the heated oil, the vinegar, salt, and black pepper, cook for a moment, and then remove from the heat.
  4. Drain the pasta; add to the chef’s pan. Stir to combine. If it is too dry, then, add a ladle of water from the pasta pot. Divide in to 2 portions and serve.

Escarole Chicken Soup


Escarole Chicken Soup

Ingredients
2 cans chicken stock, 41 ozs. each
4 bone-in, skin-on chicken breasts
1 can garbanzo beans, drained and rinsed
1 can diced tomatoes, drained
2 medium onions, chopped
3 carrots, chopped
3 celery ribs, chopped
1 bay leaf
2 tsp. dried oregano
1 lb. escarole coarsely chopped (about 4 small heads)
8 cloves garlic, chopped
2\3 cup rice

Procedure
  1. Preheat oven to 400 degrees. Thoroughly salt and pepper chicken breasts and place on a baking sheet in the center rack for 40 minutes. Allow to cool 30 minutes, discard bones and skin. Pull chicken apart into bite size pieces and set aside.
  2. Chop onions, celery, carrots and garlic. In a heavy bottomed soup pot, heat oil. Sautee garlic, onion, carrots, and celery until tender.
  3. Wash escarole making sure to remove all dirt and sand, and then chop coarsely. Add oregano, stock, bay leaf and escarole to the pot and bring to a boil. Reduce to a simmer. Add the rice and cook for 20 minutes or until done.
  4. Add the chicken, tomatoes and garbanzo beans. Adjust salt and pepper to taste. Bring up to heat.

Endive Boats with Black Pepper Bacon, Whole Grain Mustard Gouda and Port-fortified Cranberries

Endive Boats with Black Pepper Bacon, Whole Grain Mustard Gouda and Port-fortified Cranberries

Ingredients
8 slices thick black peppercorn bacon, fried, drained and cut into 1\2 inch pieces
4 Belgian Endives, root-end trimmed, leaves separated and cleaned
8 oz. whole grain mustard Gouda cheese, sliced into long, thin strips
1\2 cup dried cranberries
5 Tablespoons honey
1 Tablespoon Balsamic vinegar
1 cup port wine

Procedure
  1. Place port wine, cranberries and honey in a small sauce pan. Bring to a simmer allowing the cranberries to plump for about 10 minutes. Remove the cranberries with a slotted spoon, then reduce the fortified wine to a syrup.
  2. Preheat the oven to 375 degrees. Place the bacon on a baking sheet with 1-inch sides. Bake the bacon until golden brown. Remove from the sheets, drain on paper towels and cut into 1\2 inch pieces.
  3. Cut about 1\2 inch of the root end of the endive. Gently separate the leaves. Using a damp cloth wipe clean the leaves large enough to hold all the other ingredients.
  4. Slice the cheese into at least as many pieces as leaves you cleaned.
  5. On a serving platter, placed shredded curly endive or baby mixed greens as a garnish and then nestle endive boats. On top of each boat, place bite size piece of cheese and bacon, 2-3 cranberries, and a light drizzle of the reduced wine syrup.

Sunday, August 13, 2006

Chewy Chocolate Chip Cookies


(This article originally appeared in the April 2006 issue of La Brea Living Magazine.)


Chewy Unboxed
by dale reinert, food editor


The early April afternoon on my way home from school was the first time that spring the warm sun truly foretold that spring could no longer be held at bay.

It was turning out to be as a momentous a semester as my teacher had promised. Flight Four, the fourth grade field program, had started with a tour of the Hamm House Museum and Log Cabin, which was way cool to me – boring to most other fourth graders. The week previous, my first hospital stay meant being absent from my own first communion party. My ogling, over-perfumed aunts couldn’t squeeze my cheeks; I wouldn’t have to be the center of attention (which I hated more that almost anything); and I didn’t have to deal with being nice in a big crowd.

Nope, just sitting in a hospital room, watching TV and eating endless Jell-O and ice cream was fine by me.

But, today I was, my mom had said, going to be special. She had forewarned warned us my father’s return to work some weeks previous meant a real paycheck today and that we would be having something other than government block cheese, bologna, and Wonder bread for dinner. I couldn’t wait.

So, I walked along the playground fence and slapping my hand along the steel diamonds of the hurricane fence, thinking tonight’s dinner might be steak. I passed the three big stone houses that shared the block with the schools and figured dinner is likely to chicken, one paycheck in seven months likely won’t go far after bills are paid.

Rounding the corner at Old Man Alba’s Store, I remembered mom’s fondness for bananas – he always kept a bin filled out front -- and figured she’d make some banana bread or at least buy a bunch of them to cut up on top of ice cream before we stirred heaping teaspoons of Nestlé’s Chocolate Quick Mix into it. We love to do that when we would squeeze that out of the grocery dollars.

Just one more long block and a corner. And I thought I could smell something. But what was it? Hamburgers? Big old messy homemade whoppers like that made over at the Lange’s – with slices of tomatoes and onions and crunchy lettuce? Sniff. SNIFF. Nope. No scent.

I walked up the three steps of the back porch leading to the kitchen, opened the door and before my eyes was spread across the table boxes and boxes of baked goods from the outlet store – Archway cookies and Little Debbie cakes. In 1974, these were fine eats, especially to a nine year-old who had been told that they’re too expensive every time he saw them in the grocery store.

Dad simply said, “Go ahead, sit down, pick a box, enjoy. This ain’t never gonna happen again. Everything was half price.”

I grab a box of Archway molasses cookies. Chewy, earthy and nutty. The next day I ate another kind of chewy cookie. Another day, another variety. I fell in love with chewy cookies. Up to that date I had only had crunchy cookies and since then I have only loved chewy cookies.

Why were all the cookies in the whole universe crunchy, except the cookies made by Archway, I wondered? Below is a basic chewy cookie recipe with some simple additive and some extra tips. Enjoy!

Chewy Cookie Dough

The Dry Ingredients:
2 1\4 cups bread flour or flour of bread machines
1 teaspoon fine grain salt
1 teaspoon baking soda

The Wet Ingredients:
2 sticks unsalted butter, melted and cooled to room temperature
1 1\2 cups brown sugar
1 egg
1 egg yolk
2 tablespoons whole milk
2 teaspoons vanilla (please use high quality)

Flavor Options:
Equivalent of 2 cups of the following flavor combinations:
  • Semisweet chocolate chips with or without walnuts
  • Macadamia nuts with white chocolate chips
  • Chopped Andie’s Mint Candies
  • Chocolate\Caramel chips with pecans
    Peanut butter chips rolled in cinnamon and sugar
      Procedure
      1. Heat oven to 350 degrees Fahrenheit.

      2. Melt the butter in a heavy-bottom small saucepan over low heat. Pour the melted butter in the mixer's work bowl. Add the sugar and brown sugar. Cream the butter and sugar on low speed. Add the egg, yolk, 2 tablespoons whole milk and vanilla extract and mix until well combined.

      3. Sift together the bread flour, salt, and baking soda. Slowly incorporate the flour mixture until thoroughly combined.

      4. Stir in the 2 cups of flavor options you decided on.

      5. Chill the dough for at least one hour or (preferably) overnight, and then scoop onto parchment-lined baking sheets, about six cookies on each sheet. I use about 2 or 2 1\2 heaping kitchen (not measuring) tablespoons per cookies – these are big cookies – just shy of a quarter of a cup measure.

      6. Bake on the middle rake of the preheated oven 11-13 minutes or until golden brown, checking the cookies after ten minutes. It helps with most ovens to rotate the baking sheet to ensure even browning. Cool completely and store in an airtight container.

      Tips and Hints:
      A. The length of time you chill the dough and the size of the cookies impacts how long you will bake the cookies.

      B. The flavor options you decide on will impact how much the cookies spread when they cook. This is true for a variety of reasons, like the amount of edible wax manufacturer’s use in their product and how some ingredients interact with others.

      C. Half of all the cookies made and consumed in America are chocolate chips, so start with that and expand there.

      Chocolate: If you want to make the chocolate-chocolate chip cookies pictured here, then reduce the amount of flour by 1\4 cup and stir 1\2 cup of Dutch-processed cocoa and 1 tablespoon instant coffee into melted butter. Roll the dough into powdered sugar before baking.

Saturday, August 12, 2006

Dublin Coddle (A St. Patrick's Day Alternative)


(This article was intended for March's La Brea Living Magazine but production difficulties prevented it from appearing.)

Coddle-ing Up to a New Tradition

My columns are often focused on reliving old family traditions or on comforting myself through the rollercoaster ups and downs life tosses my way. But, like each person in every generation, I discover new traditions.

With St. Patrick’s Day fast upon us, I thought I would share one of my traditions. Made every year on St. Patrick’s Day since my first trip to Dublin, I have spent this traditionally heavy drinking night at home cuddled up with one Guinness, several slices of buttered, hot Irish soda bread, and a generous bowl of Dublin Coddle.

Coddle is a baked dish of ham, sausage, red potatoes, and onions. Since the sausages are baked, their texture is similar to having been poached, rather than fried.

When you travel to Ireland you will have a hard time finding this dish outside of Dublin, and inside Dublin you will find versions of it catering to tourists who wouldn’t know the difference between something cheap served to tourists and something hearty served to locals.

Quite frankly – I am not sure I have ever learned the difference between the authentic and the tourist versions of this dish. Here’s what logic tells me: (1) I am not a fan of the flavor of things corned, e. g. corned beef and cabbage; (2) the finer the grind of the sausage meat, the less likely it is true to the original dish; and (3) American cured ham contains more salt than Irish, so avoid salting the coddle until the very last moment.

Dale’s Dublin Coddle (serves 6-8)
Ingredients:
2 large English Bangers (sausages)
1 package large link pork breakfast sausages
1 pound ham shank with skin and fat, cubed into 2 inch pieces
2 white onions cut into eighths still attached at the root end
1 pound red new potatoes cut to one inch diameter
Parsley
Salt
Pepper
Procedure:
  1. Preheat the oven to 375 degrees. Fill a one gallon pot with two quarts of water and place on high heat. Puncture the casing on the Bangers and sausages. Place in water.
  2. Cut a pound chunk of ham, including skin and fat, of the shank end of cured ham. Dice the chunk into two-inch cubes. Add the cubes to the pot of sausages.
  3. Allow the meats to simmer for 10 minutes and then remove from the water.
  4. Pick over the potatoes and cut the large ones down to one-inch diameters. Cut the onions into eighths, leaving the sections attached at the root end.
  5. In a large casserole with a fitted lid, place all the ingredients alternating between meat, potatoes and onions. Sprinkle with freshly ground black pepper.
  6. When all the ingredients are in the casserole, ladle the hot water over the ingredients just to cover. Place in the oven, leaving the lid askew. Bake for 60 minutes or until the potatoes are fork tender.
  7. Spoon into soup bowls and sprinkle generously with chopped parsley. Adjust salt and pepper to taste. Serve with warm Irish soda bread.
Brown Irish Soda Bread (serves 6-8)

Ingredients:
2 1\4 cups of unbleached all-purpose flour, 1\4 cup more reserved
1\2 cup quick cook rolled oats
1\4 cup wheat germ
2 tsp. baking soda
1 tsp. kosher salt
4 Tbls. Unsalted butter
1 1\2 cups plain, low fat yogurt

Procedure:
  1. Preheat the oven to 400 degrees. Place a heavy baking sheet with a sheet of parchment paper on the center rack.
  2. In a large bowl, mix together the flour, rolled oats, wheat germ, baking soda and salt. Whisk together until even distributed.
  3. Measure 1 1\2 cups of yogurt and set aside.
  4. Using one hand, mix the 4 tablespoons of room temperature unsalted butter into the dry ingredients until the butter is well incorporated.
  5. Scoop the yogurt out of the measuring cup with your mixing hand and mix it into the batter, which is very sticky.
  6. Once all the ingredients have been mixed together, knead the dough with your mixing hand while adding a sprinkling from the 1\4 cup of reserved flour. Knead for at least three minutes or until the stickiness disappears from the dough.
  7. Turn the dough out onto a well floured surface, shape into a ball, using a knife cut an “X” into the ball and place on the heated baking sheet.
  8. Bake for about 35 minutes or until golden brown and hollow to the knock. Serve with room temperature unsalted butter.

Thursday, August 10, 2006

Chocolate - Chestnut Mousse


(This article originally appeared in the February 2006
issue of LaBrea Living Magazine.)


It’s Name Threatens Hell,
but this Dessert is Heavenly


by dale reinert,
food editor

December 30th, 2005 – I had never been to Paris before. But I had a plan. After reading two tour books and having traveled to many other European cities, it was going to be simple. I was not going to take a tour bus ride to orientate myself to the city. I was not going to go to the restaurants highlighted in books and noted by friends.

Determined to discover this timeless city in a way that made it my own, I went out and walked and walked. I was seeking Paris on my own terms. I would tour the city’s sights from noon till 5 in the afternoon, then nap, shower and head out to an early dinner around 7:00 p.m. – well ahead of the crowds of Parisians who typically arrive closer to 8:30 p.m.

I left the bed and breakfast and walk north along the rue de Lyon. Circling the Place de Bastille, I marveled at the giant opera with its partial round design echoing the famed prison that once stood in this spot.

I headed east along the rue du Rivoli, which if Paris has an old style main street, it is definitely Rivoli. Long, narrow and cramped, Rivoli was crowded in the snowy, off-season and I couldn’t imagine the tight quarters people experienced along Rivoli on a warm, summer night.

I wandered through the Marais, and was stunned by the pipe-skinned modern Pompidou Center and was caught by the contrast between its soaring size on one end of a fountain and the soaring spires of St. Merri’s Church at the opposite end.

On the narrow cobblestone pathways that lace through the Marais, I walk past many restaurants. I read menus, noted interior decors, and let each eatery speak to me. This night the voice of El Pavé spoke clearest.

I enjoyed the appetizer of simmered baby leeks garnished with a sauce of beet and mint as well as the French peasant main dish of pot-au-feu, with creamy marrow and melted connective tissue, the dish was pure flavor and way too much for me to eat.

For dessert, I order L’Damnation, described as chestnut mousse topped with crème fraiche and covered in hot, dark chocolate sauce. Its name seemed naughty and I am always intrigued by the melding of chocolate and nut flavors. The roundness of the flavors stunned me. I ate and ate and couldn’t stop eating. Immediately upon finishing it, I looked up wanting more, longing for more. Here is my interpretation of L’Damnation, which really is quite heavenly.

Chocolate - Chestnut Mousse

Ingredients
1 12-ounce package semisweet chocolate, melted
1/2 cup
unsalted butter
1 15 ½-ounce can of
chestnut puree
1/2 tsp
vanilla
1/4 tsp kosher
salt
1 cup heavy cream, beaten to stiff peaks
4 egg whites, beaten to form soft peaks
1/2 tsp
cream of tartar
1/2 cup
sugar
3 Tbls of water


Procedure
1. Melt the chocolate and butter in a double boiler over very low heat. When the chocolate is completely melted, remove the top pan from the heat.

2. In a bowl, mash the chestnut puree into little bits. Once it is broken up, use a wooden spoon to incorporate into the melted chocolate and butter. Stir in the vanilla and kosher salt. Allow the mixture to cool to room temperature.

3. In a metal bowl that has been made cold by sitting in the refrigerator or freezer for at least 30 minutes, beat the heavy cream until stiff and fold into the chocolate-butter mixture.

4. Heat the sugar and 3 tbsp water to boiling, stirring until it reaches 240oF degrees. The color should be a light golden brown caramel.

5. Using the whisk attachment of your stand mixer, begin to beat the egg whites and cream of tartar while slowly incorporating the hot syrup into the egg whites. Continue beating the mixture until soft peaks form.

6. Gently fold in the chocolate mixture into the sugar-egg whites. Spoon into individual dessert dishes. Remember to leave room for the crème fraiche and hot dark chocolate sauce.

7. Cover and refrigerate until completely set – at least 4 hours. Hints and Tips: To finish the mousse, top it with either sweetened whipped cream or the tart, tangy flavor of mascarpone cheese, crème fraiche, or even homemade yogurt cheese. These tangy flavors will round out the deep sweetness of the mousse.

Wednesday, August 09, 2006

Chili Con Carne

(This article originally appeared in the January 2006
issue of LaBrea Living Magazine. )

Chili Individuation
by dale reinert, food editor
I am emotionally connected to my dad. For many years, he had estranged himself from the family. He kept his distance through beer and sleeping in the lazy boy.
But over the years he and I found common ground through sharing differing opinions on what may be the most American of all foods -- chili.
Some argue that Chili -- a stew of chile pods, onions and peppers -- was created in Mexico. Other say Texas is its birthplace. And most forget that Los Angeles was once commonly accepted as the chili capital of the world. Giant Fiberglas chili pots sat atop a chain of chili joints during LA's architecture-reflects-product period, the 1950s when burgers, fries and hotdogs were often finished with a ladle chili.
Even Tommy of Tommy Burgers fame is credited with introducing "chili-size" and a "chili straight" into the American vernacular.
Cincinnati's Skyline Chili introduced America to the terms such as 3-way, 4-way and 5-way chili. Straight chili in Cincinnati is a tomatoey gravy over spaghetti. Adding beans or onions or cheese is picking a "way" to have your chili customized.
The chili upon which I was raised was absent the spaghetti of Cincinnati or the rice of New Mexico or the bread bowls that seem popular in some are eateries.
The chili I was raised on was a hearty simmer of fried ground beef, diced tomatoes, red kidney beans, onions, green bell peppers and a sprinkling of chili powder, happily served with a heap of crumbled saltines stirred in to absorb all the broth. In adolescence, my dad discovered V-8 juice and soon the chili was fortified with it.
As I moved around the country working for a school district here and there and as I vacationed in varying parts of the south central and western states, my own variation of chili emerged.
I shifted from solely using chili powder to using both chili powder and ground New Mexico Chiles. I added Pasilla Peppers to the Bell Peppers. Caramelizing the onions, instead of briefly sweating them, as my dad had done, brings sweetness to the spice of chiles. And switching from ground beef to cubed chuck roast became my signature within the family. Each individual has their own chili expression.

Dale's Chili Con Carne

Ingredients:
2 pounds Chuck roast cubed into bite-size pieces
1 half Green bell pepper, medium dice
1 half Red bell pepper, medium dice
1 half Yellow bell pepper, medium dice
4 large Pasilla Chiles, fine dice
1 large Onion, medium dice
1 can 28 ounce can of tomato puree
1 can Beef broth or stock, low sodium
4 cans Beans (see note below)
2 Tbls. Chili powder
2 Tbls. New Mexico Chiles, ground
2 Tbls. Cumin powder, ground
1\8 tsp. Cayenne Pepper
Salt
Black pepper

Procedure:
Prepare the peppers, onion, chiles and beef by cubing or dicing them and placing them into separate bowls. Preheat the oven to 250 degrees.
Mix together the chili and cumin powders, the cayenne pepper and the ground New Mexico chiles in a small prep bowl and set aside.
Heat a heavy-bottomed soup pot or LeCrueset Casserole. Coat the heated pan's bottom with Canola oil. Add the peppers and saute on medium high heat until translucent. Place in a large bowl and repeat with the diced Pasilla Chiles. This will take about 10 minutes.
Saute the onions next, but turn the flame down to medium and brown the onions until a good dark caramel color develops. This may take up to 20 minutes. Remove to the same bowl as the peppers and chiles.
Add more oil to the pan and saute the cubed chuck roast in small batches. The small batches encourage additional caramelization. When the meat is browned on both sides, remove and reserve with the onions, peppers and chiles.
Once all the meat is browned and removed from the pan. Add the spice mixture. Stirring constantly, move the spices around the pan. This "heat treatment" will awaken the ground spices' flavors and adds a layer of subtle smokiness.
After a minute or so, add the tomato puree and can of beef broth. Stir again to scrap free the spices and tiny pieces of beef, onion and vegetables that have been caramelized to the pan.
Add back the meat, onion, peppers and chiles and stir to incorporate. Cover with a heavy lid and place in the oven for 2-3 hours.
Remove the pan from the oven and add the beans. Because everything is cooked, you only need to warm the beans through. The residual heat can do that or place the pan of chili atop a low flame. Taste and adjust the salt and pepper to taste.
Tips:
Chuck roast is a relatively inexpensive cut of meat. Cooking it long and slow allows it to gain flavor from the melting connective tissues and become tender.
Wait to add the beans until the very end because the salt used to sweat, saute and brown the meat and vegetables will toughen the skin of the beans the longer the beans cook in the chili.
Use beans, like Bush's Best Beans for Chili in Mild Sauce, or your favorite beans. I stay away from red kidney beans because of their already-tough exterior skin.
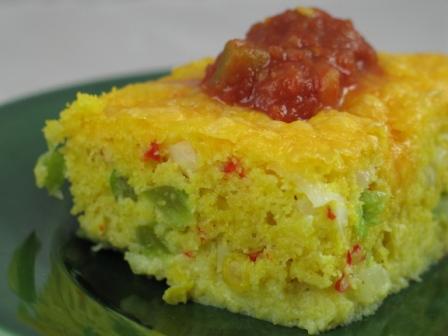
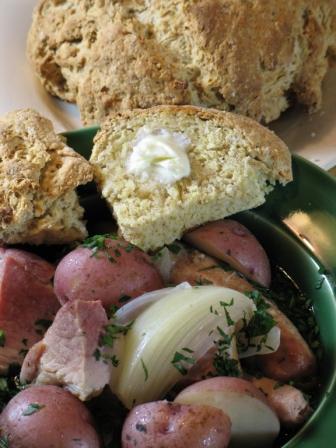
Serve over white or seasoned rice and with a variety of accompaniments, like shredded cheese, Salsa, slivered scallions, chopped onions, hot sauce, biscuits, corn bread, saltine crackers, or even Fritos corn chips.
Pasilla chiles are typically mild but can easily have some heat to them as well. So, taste them raw to see exactly how many you want to add to your chili.
In prepping for this article, I spoke with my younger brother Wayne, a certifiable "chili head." He says he places one large, peeled carrot in the bottom of the chili pot. He says the carrot prevents gas. I am more than a little skeptical at this.